Seiko 7A38 - by the numbers
Subtitle
Forums
| Forum Home > Bend it, Mend it - Mods & Wreckers > My long-time-coming 7A38 Franken Panda Project | ||
|---|---|---|
 Site Owner Posts: 14428 |
Harking back to the days when I was posting on the RLT watch forum, in August 2010, I started a thread with the self-explanatory title: A Few Of My Own 7A38 'Frankens' - Shock, Horror ! When it's done to Seiko Divers - more politely known as modding .... In it, over an 18 month period, I documented my various efforts - some more successful than others, at customizing Seiko 7A38's. In July 2011, Bruce (a.k.a. 7A8lvr) wrote: http://www.thewatchforum.co.uk/index.php?showtopic=57525&view=findpost&p=679065 Paul, Beautiful work! Have you ever considered experimenting with franken panda configurations involving the 7A series of watches? It may just be a matter of my own personal taste, but I have always admired the white dial/black subdial and black dial/white subdial panda configurations evident in other Seiko series of watches (6138 or 7T32, for example) and apparently lacking in the 7A series. I suppose someone with advanced photo editing skills could produce previews without having to do the actual build out. | |
| ||
 Site Owner Posts: 14428 |
A good suggestion on Bruce's part. Though not a high priority for myself at the time. But I knew I could and would do one eventually. In the meantime, I'd added a few passable-looking non-Seiko 7A38 'Panda's to my collection: the Jaz N8YZ669, an Orient J39725-70 and more recently a 'Panda' Kamatz 517000; plus a rather nice two-tone Panda dial 7T59, so my Panda urges had been pandered to. My coincidental response to Bruce was to build something vaguely resembling a 'Panda', that I'd particularly wanted to do at the time. To see if I could replicate the infamous SpeedTimerKollection 7A38-702x Franken - but building it 'properly'. Which I think I achieved:
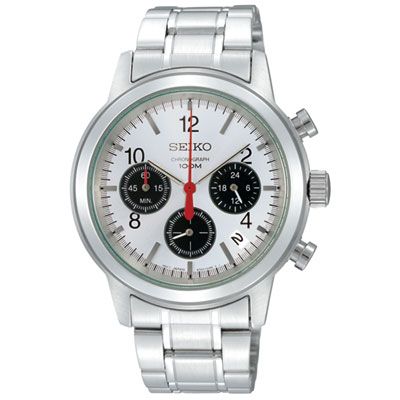
I already have two ongoing, but stalled Franken 7A38 projects - My Mark 2 Franken Ferrari and my 7A38 into 7A28 Franken Diver. They've been on the back burner for a couple of months and both may yet take slightly different directions from my original concepts. As had Bruce's suggestion of a Panda dialed Franken 7A38. But it wasn't forgotten altogether. My interest was rekindled by a recent review article on SCWF: http://www.thewatchsite.com/index.php/topic,39451.html .... the title of which reads as: Is Seiko SSB003P1 a solid affordable quartz panda dial? Any reviews? In summary, it's a fairly cheap low-end Seiko quartz chrono', based on the 6T63 movement .... but the overall look is still pleasing.
However, the main dial colour is not pure white, as it appears in many of the stock illustrations - but typically Silvery-White:
Coincidentally, I'd also recently read about a Tag Heuer limited edition, although this article doesn't actually include the term 'Panda': http://www.calibre11.com/review-tag-heuer-carrera-jack-heuer-80-birthday/ Quote: The silver dial has a star-burst finish that gives the dial a different appearance depending on the light. You can see in these photos that the dial can appear grey at times and “almost-white” at others. It’s a beautiful dial and one that you can’t stop looking at. | |
| ||
 Site Owner Posts: 14428 |
Part of what I wrote at the time, in response to Bruce's question was me thinking aloud:
Whereas it's do-able, it won't be easy to come up with a pure white / black sub-dialed combination using 7A38 dials. Most of the 'white' dials used on 7A38's aren't (pure) white at all - they're silvery or pearly white, or distinctly off-white / cream. Which might go part way to explaining why their colours are shown as 'silver' (or sometimes left blank) on Seiko's database. I'm thinking here about the all-stainless 7A38's using common dials such as the 710LSX dials: -7090; -7190; -7280/9, etc. .... That's what I've now decided to use for the top dial plate - not one of the few pure white 7A38 dials, but the Silvery White 710LSX dial. | |
| ||
 Site Owner Posts: 14428 |
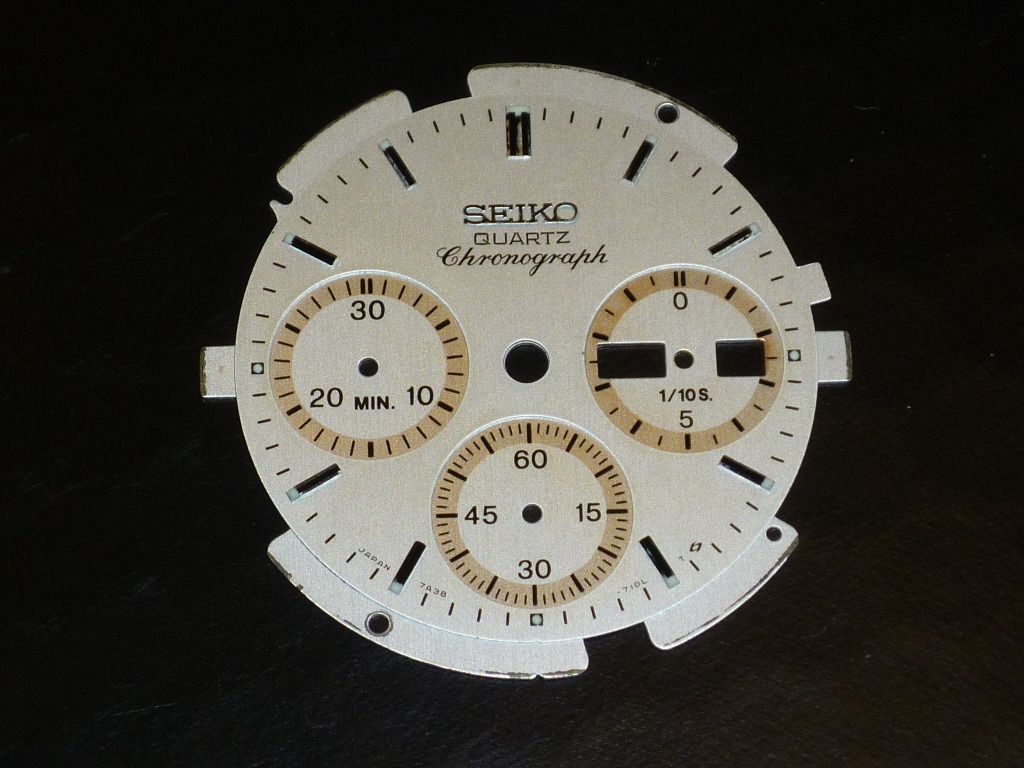
I've only ever split two 7A38 dials before - the 2 gash 703L dials from the two-tone 7A38-7020 'beater' and the battery acid damaged 7A38-7029 which I used to make the previous 'composite dialed' 7A38-702x Franken shown in my second post. The 710L dial is very slightly different in construction from the 703L dial, as I later found out - plus I'm still not 100% sure whether the baton rivets / through holes are going to line up between the 710L upper dial plate and 703L lower (sub-dial) plate that I plan to use. So rather than start with a 'good' dial, I picked a gash one to practice on. We've already seen plenty of evidence already of white 710L dials with stained sub-dials - it's usually caused by either battery leakage or moisture ingress. I had such a dial in my bits box - from a stainless 7A38-7190 (or -7280) which had suffered from water damage. It doesn't look too bad in this artificially lit photo I took yesterday, but you can just about discern the staining in the 3 o'clock subdial.
| |
| ||
 Site Owner Posts: 14428 |
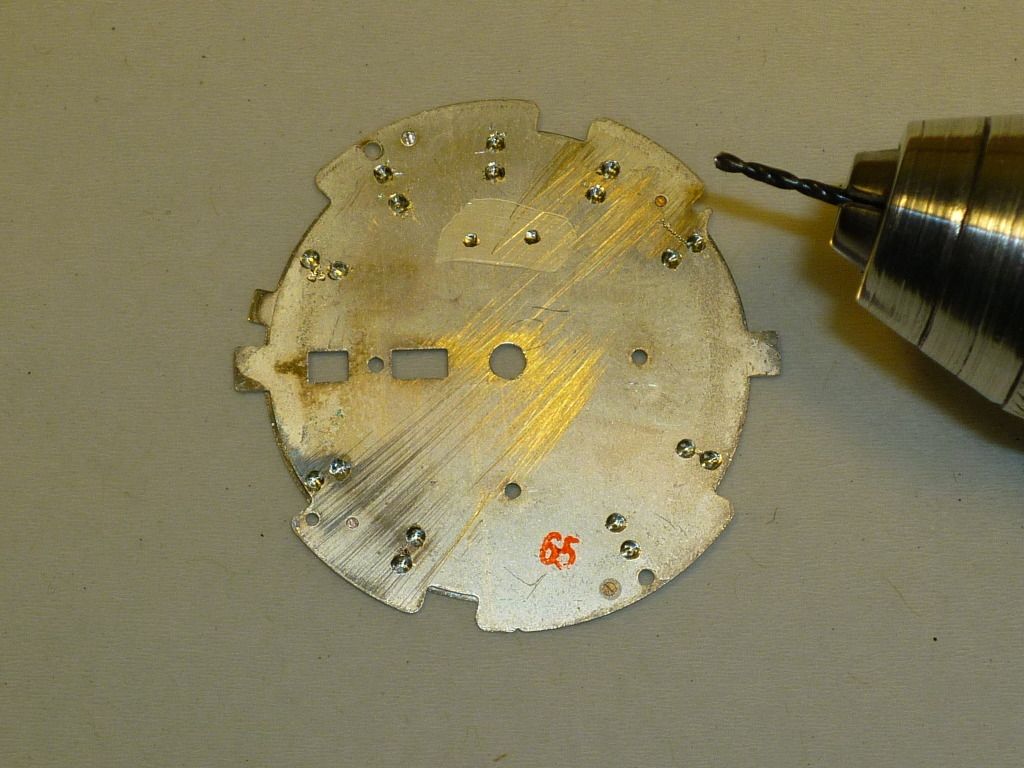
It actually looked far worse from underneath - you can see the path the moisture followed, that caused the discolouration in the subs:
If you look very carefully, you can see the pairs of copper-coloured rivet heads where the baton posts go through the two dial plates. Therein lay part of the problem with this dial. These things are about 0.25mm in diameter - and you need to drill them out - carefully ! If you drill through too far, you risk pushing the baton out of the top dial plate (which in this instance was the part I needed to keep). Incidentally, the lower dial plate is approx 0.35mm thick and the upper dial plate about 0.25mm thick on a 710L dial. Here is a much better lit shot of the clean underside of one of the 703L dials I used for the previous 'composite dialed' Franken:
| |
| ||
 Site Owner Posts: 14428 |
Before I go any further, I'll say now that (apart from deliberately butchering perfectly good dials) I'm open to criticism of my technique. It may seem a bit crude, amateurish even, but I find gentle steady pressure with a hand-held mini-drill better than using a drill stand. I have two sizes of mini-drills - the larger Dremel Moto-Tool is complete with the proprietory Dremel post drill stand - but not for me. Because the baton legs ends have been peened over during manufacturing, effectively turning them into rivets, it doesn't really make sense to centre dot them. All you're likely to succeed in doing is making the rivets expand further and the plates harder to separate. I've tried using a slightly more delicate 'engineering' approach, using both 0.50mm and 0.75mm twist drills (remembering the target you're trying to obliterate is approx. 0.25mm diameter), but these smaller drill bits flex and can very easily squirrel away from their starting point. What I've found works best for me is using 1.0mm drills and 'countersinking' them. Just don't drill too deeply ! The problem with this 710L dial I'd chosen to practice on, was that I couldn't see the rivets that clearly, because of the tarnishing. A few quick rounds of 18 holes, a couple of cups of coffee and cigarettes (supposedly to steady my nerves) and an hour or so later:
At this stage, I'd probably been around the dial 4 or 5 times, gradually deepening the holes, looking for any signs of the two dial plates beginning to separate. There weren't any. I also took the precaution of drilling through the legs of the Seiko logo (which had caught me out previously when I'd been trying to split the 703L dials). But still no go, even when trying to 'help' them apart with a scalpel blade. Then I noticed the 2 dial feet (one of them is visible near the drill bit) which hadn't featured on the 703L dials that I'd split previously. | |
| ||
 Site Owner Posts: 14428 |
Gentlemen. We have first stage separation.
As you can see from the lower plate I missed quite a few of the baton holes by a country mile, but half were almost exactly spot on. The resultant top plate came out better than I'd expected, given my rather slapdash efforts at drilling out the rivets. All the batons are still securely located - as was miraculously, this time, the Seiko logo. Believe me - you don't want one of them flapping about loose !
However, this dial has a couple of small flaws: the most visible of which is the small paint chip to the left edge of the 3 o'clock sub-dial. It was there before I started. Like I said, this was a trial separation. Next time I'll be using a pristine NOS 710L dial from a sample case. | |
| ||
 Site Owner Posts: 14428 |
But first I thought I'd try tackling something a little easier. You have no idea how nerve-wracking this can be. I decided to do the lower black subdial plate next. It was going to be sourced from a taupe / black subdial 703L dial. Back in December 2011, I'd bought another partial 7A38-7029 sample case from 49Ronnie. This is the small listing photo:
As you can see, it had been robbed of two subdial hands. I'd already re-deployed the case to improve one of my own 7A38-7029's. The dial and remaining hands (still fixed in situ) had been sat in my spares box. I'd been debating whether to use this dial in another 'beater' 7A38-7029, where the lume was slightly aged, but I'd noticed some 'handling' marks on this dial, in the area of the 10 and 11 o'clock batons. Yesterday morning I pulled the main hands off this sample dial (naturally using a small slotted piece of paper to protect the dial) to find another deeper mark, where someone had obviously tried (and failed) to pull the hands previously. This dial was going to become the donor for my Panda project - instead of the swapped out 703L dial that I'd originally planned to use. Here's a Q&D shot I took just before I tried carefully splitting the dial plates for the first time. Tiny bits of swarf everywhere !
This time the two plates came apart cleanly. It seems I'd drilled though almost exactly the right depth. Practice makes perfect.
Here's a better shot of the lower 703L dial plate after a quick clean up with Rodico:
Looks like every through drilling was spot on this time, despite the drill bit having squirreled off centre on two or three occasions. No burrs nor lifted paint on the important lower plate, fortunately and I only over-drilled one hole near 40 on the seconds subdial. | |
| ||
 Site Owner Posts: 14428 |
Next candidate for the chopping block will be this - the pristine 710L dial from a 7A38-7289 sample case.
| |
| ||
 Member Posts: 458 |
Really interesting and informative thread Paul. I'd been wondering exactly how you did this, and whilst I'd guessed this was what you were doing, actually seeing it (and in such detail) explains a lot. I'd not noticed before the small 'v' notch at 6pm on both dial plates. Looking forwards to seeing how you re-attach the dials ........ | |
| ||
 Site Owner Posts: 14428 |
Thanks for the words of encouragement, Simon, but this little topic pales into insignificance compared to some of your own threads. I'm a little way from re-attaching the dial plates. I've still yet to separate the silvery-white 710L top dial plate which I intend to use. I did pull the hands from that 7A38-7289 sample dial yesterday (without marking it), but didn't feel in the quite right frame of mind for another mini-drilling session. As you've probably gathered, one needs to psych oneself up before boldly going .... When we spoke on the phone, Simon had pointed out that there was technically one photo 'missing' (from those I've posted so far) .... and that's a shot of the underside of a top dial plate. In fact, the first 'trial separation' 710L dial which I split (a week ago) wouldn't now show very much, because after I'd successfully separated it, I carefully flatted off the underside using 2000 grade Wet and Dry paper. So here instead is the underside of the (ex-7A38-7029) Taupe 703L top dial plate (which is now effectively surplus to requirements):
As you can see, I came very close to over-drilling one or two holes (although it was actually academic in this case). This 703L plate is <0.25mm thick. A few thousands more would likely have resulted in the drill bit pushing the baton legs out of the upper dial plate. Right at the top of the dial, you can see scratch marks where I inserted the scalpel blade, to start levering the two halves apart. Note also the 'superglue' residue around the SEIKO logo post holes, where it had leached between the two dial plates. That's a clue as to what I'll be using to re-attach the two plates when I ultimately get around to reassembling them. Needless to say, I have already dropped my 'trial separation' 710L top plate onto the lower black 703L subdial plate (for a quick sneak preview of how it would look). That was the main reason I skimmed it, so as not to risk anything sharp that might be protuding, from scratching the paint of the pristine bottom plate. | |
| ||








You must login to post.